
Configuring Okta Sign-in Widget in Angular Application
Configuring Okta Sign-in Widget in Angular Application: Step-by-Step Guide


Overview
Configuring the Okta Sign-in Widget in an Angular application allows you to integrate Okta's authentication and authorization services into your application seamlessly. The Okta Sign-in Widget provides a pre-built user interface for login and registration flows, making it easier to implement secure authentication in your Angular application.
Steps to Create an Okta Application by Creating an Okta developer account
Set up an Okta Developer Account: If you don't have one already, sign up for an Okta Developer Account at the Okta Developer Console (developer.okta.com). This will provide you with the necessary credentials and configuration options.
Create an Okta Application:
After logging in to your Okta Developer account, you will see a menu on the top left corner of the screen.
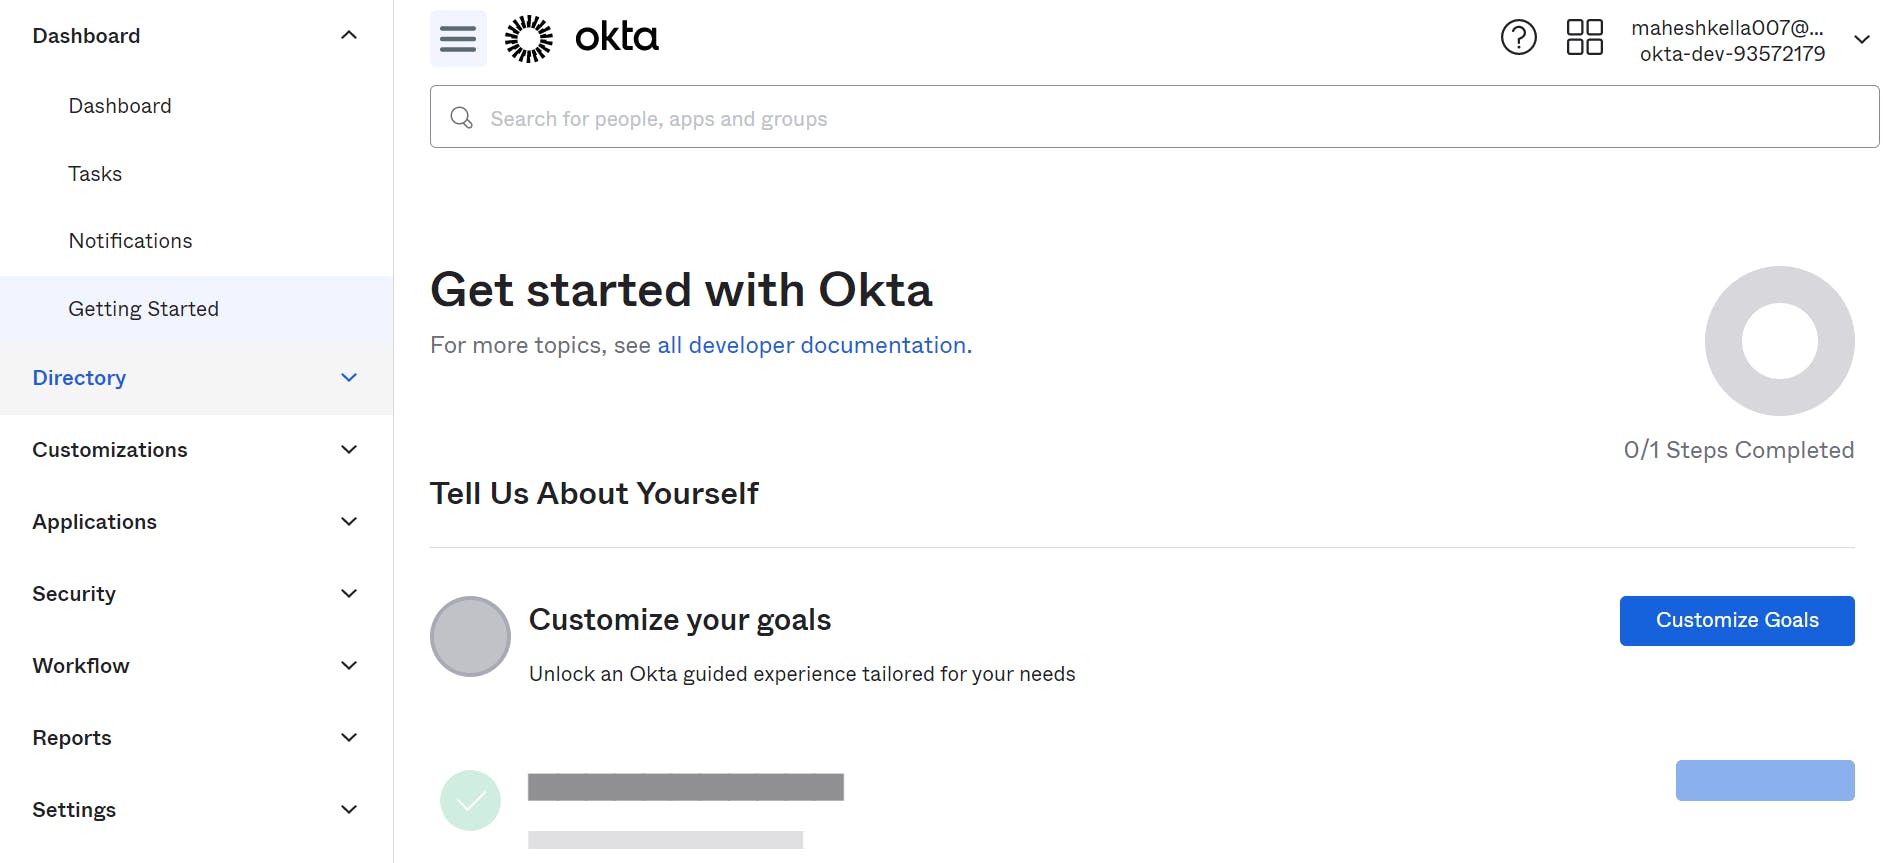
Click on the "Applications" option in the menu. This will take you to the Applications page.
On the Applications page, you will find a button labeled "Create App Integration." Click on this button to start creating a new Okta Application.
On the Create new app integration page select OIDC - OpenID Connect then a pop-up will be appeared. This pop-up will prompt you to provide additional details.
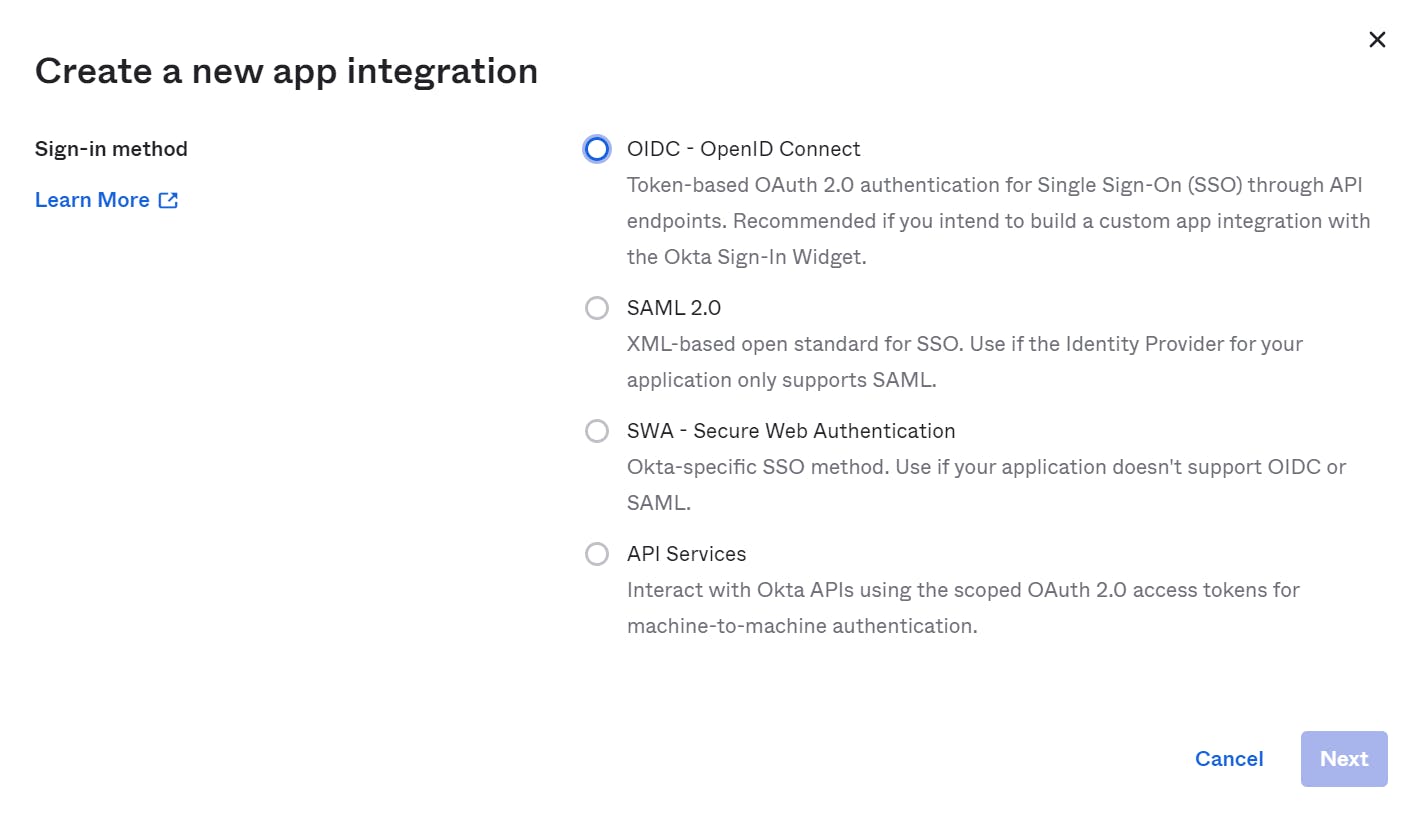
You will be presented with different options for creating an application. Choose the appropriate option based on your requirements. In our case
we are selecting "Single-Page Application" for our Angular Application then Click next.
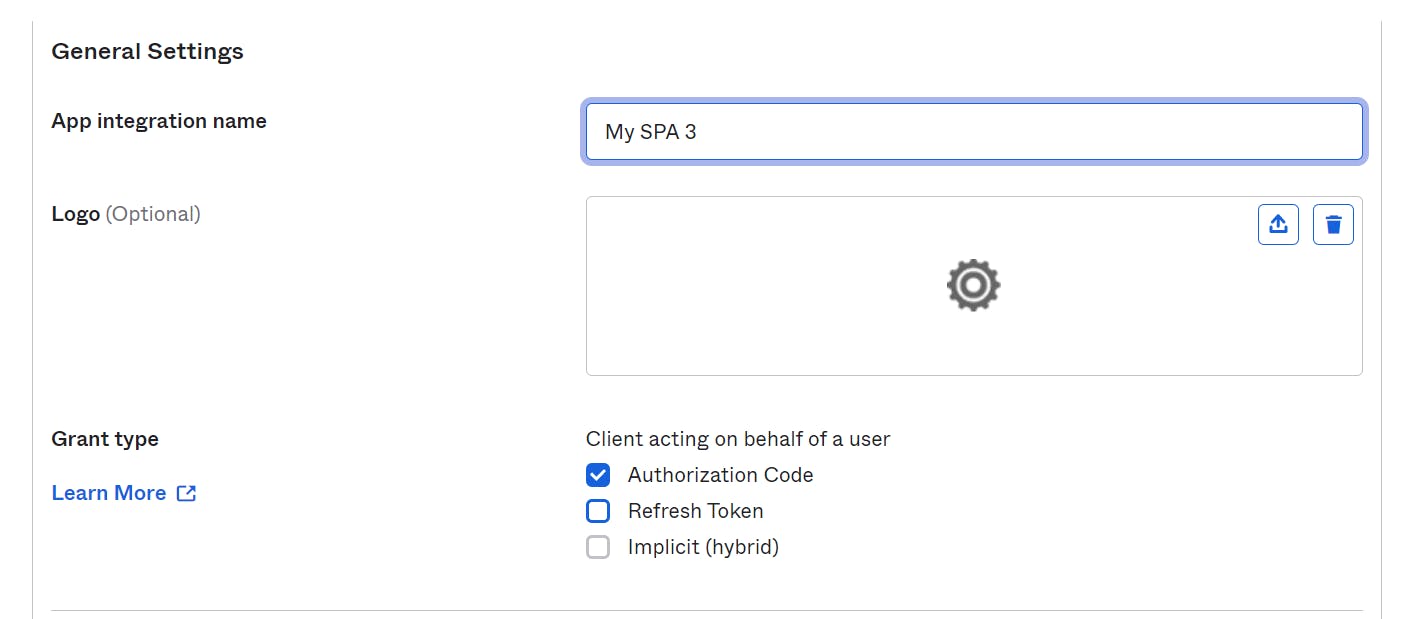
After clicking "Next" on the pop-up, you will be presented with the "New Single-Page App Integration" page. On this page, you will find several fields that you need to fill in to use later in your Angular application.
There is a field called "App Integration Name" where you need to provide a name for your application integration. Enter the name of your application in this field.
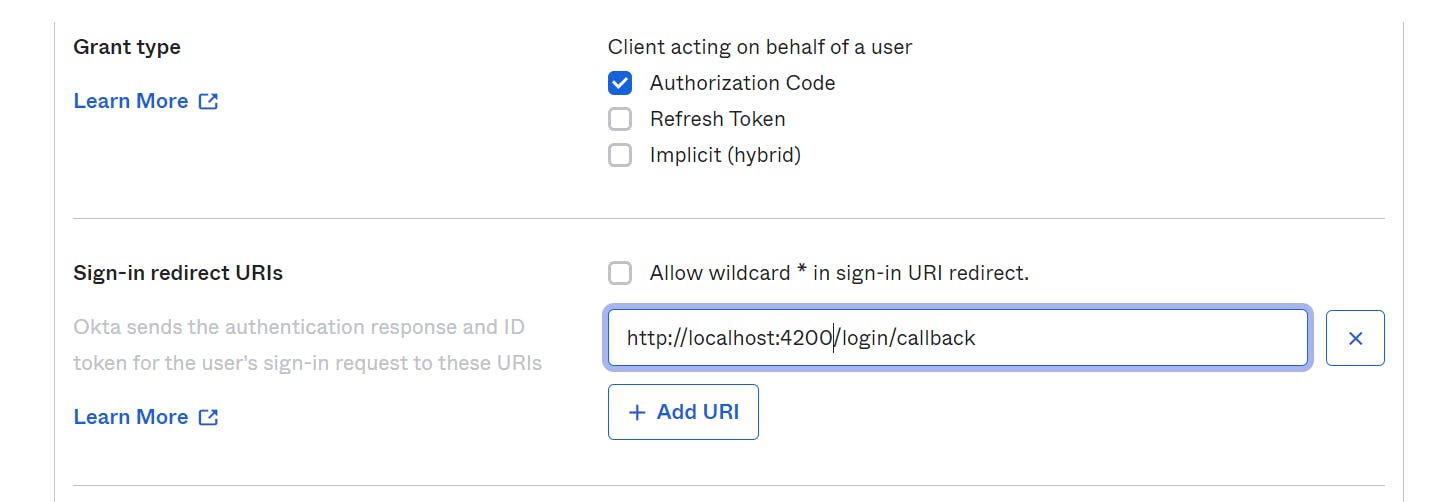
On the "New Single-Page App Integration" page, select the "Authorization Code" grant type. This grant type is commonly used in Angular applications and provides a secure authentication flow by exchanging an authorization code for access and refresh tokens.
In the "Sign-in redirect URIs" field, enter the appropriate URI for your Angular application's sign-in callback endpoint. This URI should match the route or endpoint in your application where you want Okta to send the authentication response and ID token after the user's sign-in request.
For example, My Angular application's sign-in callback endpoint is "http://localhost:4200/login/callback", enter this URI in the "Sign-in redirect URIs" field.
In the "Sign out redirect URIs" field, enter the appropriate URI where you want Okta to redirect the user after they sign out from your Angular application. This URI should match the route or endpoint in your application where you want the user to be redirected after signing out.
For example, In my Angular application's sign-out URI is "http://localhost:4200", enter this URI in the "Sign-out redirect URIs" field. When the user signs out, Okta will redirect them to this URI.
In the "Controlled Access" field, select the option that reads "Allow everyone in your organization to access". This setting ensures that access to your application is granted to all users within your organization without any restrictions.
Click the "Save" button to create the Okta application. Once you click the button, the Okta application will be successfully created, and a unique Client ID will be generated. This Client ID is an important identifier that will be used in your Angular application to establish communication with Okta for authentication and authorization purposes.
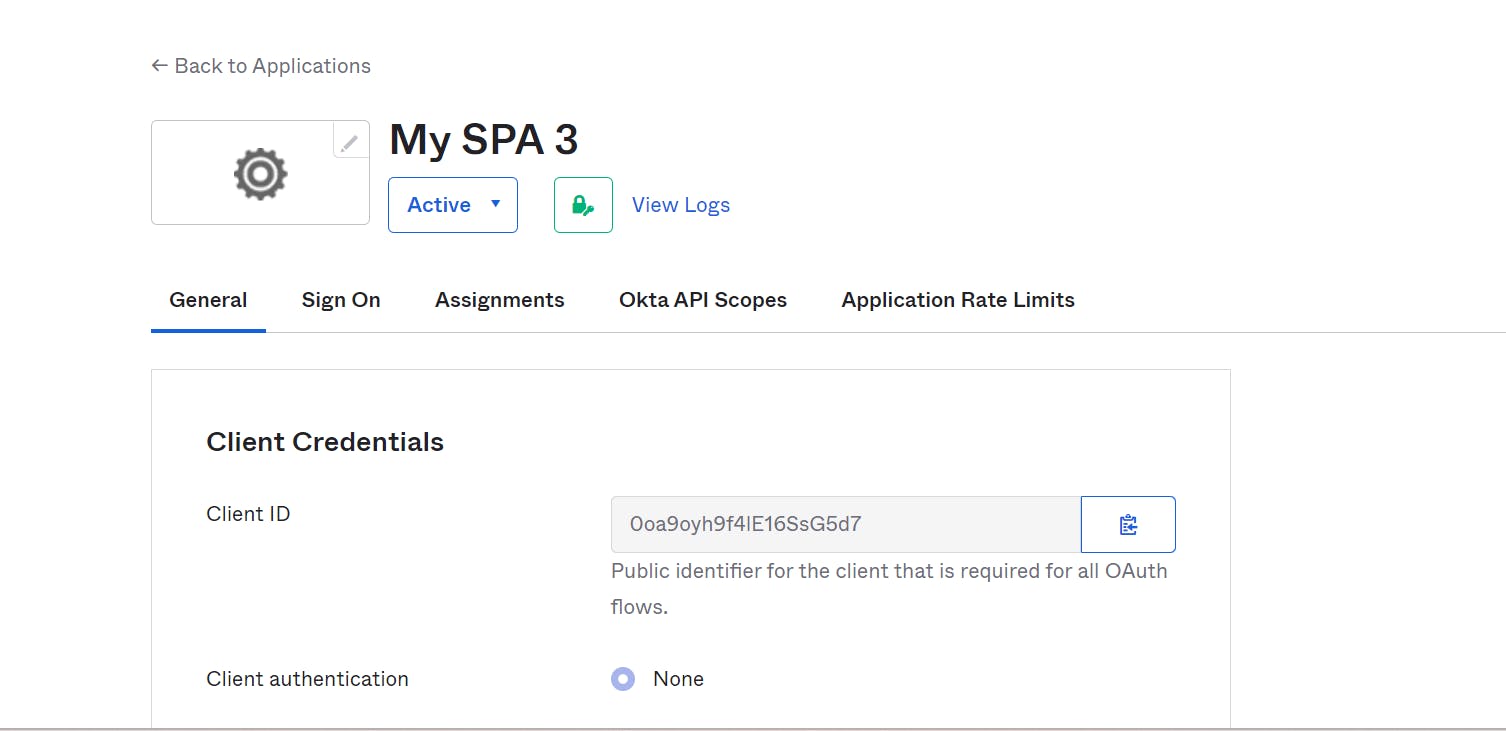
To find the issuer ID, navigate to the top right corner of the Okta Developer page. Look for the issuer ID, which is typically displayed in a prominent location.
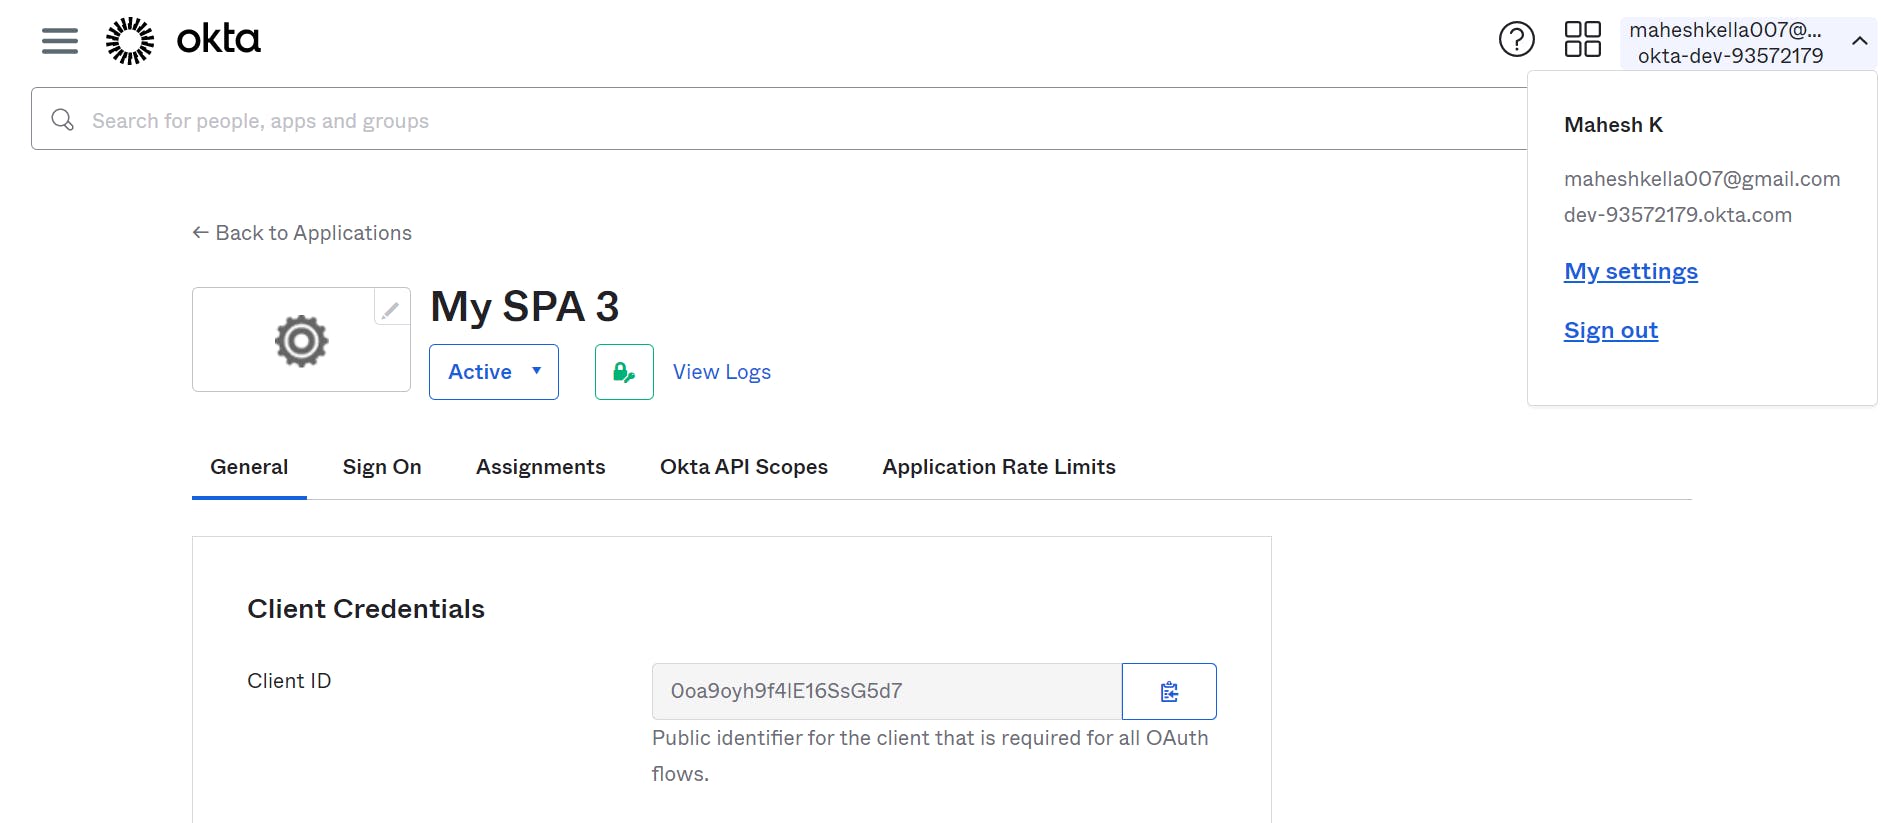
Copy the issuer ID, Client ID and Redirect URIs as it is an important piece of information needed for configuring the Okta Sign-in Widget in your Angular application.
Setting Up The Angular Project
Let's start our Okta login page in our Angular Application:
Create a new Angular Application: On opening VS Code IDE create an Angular application using the command
ng new project_nameon the terminal.After completing the project setup, you can proceed to create a login component in your Angular application where you will host the Okta Sign-in Widget, You can Create a login component by using this command
ng g c components/loginon your terminal.In addition to the login component, you can create a login status component in your Angular application to display the user details. This component will provide information about the currently logged-in user. You can create a login-status component by using the command ng g c components/login-status on your terminal.
To install the Okta packages in your Angular application, open your terminal and execute the following commands one by one:
Run
npm install @okta/okta-signin-widgetto install the Okta Sign-in Widget package. This package provides the necessary functionality to integrate the Okta authentication flow into your application.Next, run
npm install @okta/okta-angularto install the Okta Angular package. This package offers Angular-specific functionalities and components for working with Okta authentication and authorization.Finally, run
npm install @okta/okta-auth-jsto install the Okta Auth JS package. This package provides a JavaScript SDK for interacting with the Okta authentication API and handling user authentication and token management.By executing these commands, you will have to install the required Okta packages in your Angular application. These packages will enable you to leverage the Okta Sign-in Widget, utilize Angular-specific features for Okta integration, and interact with the Okta authentication API using the provided JavaScript SDK.
Add Bootstrap to your Angular Application using
npm install bootstrapin your terminal, It will install the latest bootstrap in your Angular Application.After these installations go to angular.json and write the path of the bootstrap, Okta-sign-in-widget in the styles and scripts field. For example,
 "styles": [
               "src/styles.css",
               "./node_modules/@okta/okta-sign-in-widget/dist/css/okta-sign-in.min.css"
             ],
             "scripts": [
               "./node_modules/bootstrap/dist/js/bootstrap.min.js",
               "./node_modules/@okta/okta-sign-in-widget/dist/js/okta-                   sign-in.min.js"
             ]
You can find the path of your bootstrap and okta-signin-widget inside the node_modules by following the above code.
Go to the login-status.component.html and write the code below.
 <div>
 <label *ngIf="isAuthenticated && userFullName" class="text-white">Welcome back {{userFullName}}</label>
 <a  *ngIf="!isAuthenticated"  class="navbar-brand text-white" routerLink="/login">Login</a>
 <button  *ngIf="isAuthenticated" class="navbar-brand btn btn-info" (click)="logout()">Logout</button>
 </div>
Make sure that isAuthenticated, userFullName and the logout function is declared in your login-status.component.ts, We will use that later.
Go to the app.component.html and create a simple Navigation bar containing the Login anchor tag on it, For example
 <nav class="navbar navbar-expand-lg bg-dark">
   <div class="ms-auto me-3">
     <app-login-status></app-login-status>
   </div>
 </nav>
 <div>
   <router-outlet></router-outlet>
 </div>
Create routes on our app-routing.module.ts
 const routes: Routes = [
   {path:'login/callback',component: OktaCallbackComponent},
   {path:'login',component:LoginComponent}
 ];
Create an interface containing the Okta Authentication details like issuer, Client Id and Redirect URIs. You can create the interface by following the
ng g interface interface_namecommand in your terminal and writing the appropriate code mentioned below.export default { oidc: { clientId:'0oa9ljd1p0vy2ZH7F5d7', issuer:'https://dev-93572179.okta.com/oauth2/default', redirectUri:'http://localhost:4200/login/callback', scopes:['openid','profile','email'] } }Here, The Client Id, issuer and redirect URIs are copied earlier on our Okta developer Account. the
scopesarray is used to specify the scopes requested during the authentication process with Okta. Scopes define the level of access and permissions that the application requests from the user's Okta account.In this case, the scopes array includes the following values:
'openid': This scope is used to request basic OpenID Connect functionality. It allows the application to retrieve an ID token containing basic user information.'profile': This scope is used to request access to additional user profile information, such as the user's name, profile picture, or other details stored in the Okta user profile.'email': This scope is used to request access to the user's email address associated with their Okta account.
By including these scopes in the authentication request, the application is asking Okta to provide the specified information and permissions for the authenticated user.
Go to the login.component.html and write the code below
<div class="pt-5">
    <div id="okta-sign-in-widget" class="pt-5"></div>
</div>
Go to app.module.ts and write the below code.
import { NgModule } from '@angular/core';
import { BrowserModule } from '@angular/platform-browser';
import { AppRoutingModule } from './app-routing.module';
import { AppComponent } from './app.component';
import { LoginComponent } from './components/login/login.component';
import { LoginStatusComponent } from './components/login-status/login-status.component';
import {
  OktaAuthModule,
  OKTA_CONFIG
} from '@okta/okta-angular';
import {OktaAuth} from '@okta/okta-auth-js';
import myAppConfig from './config/my-app-config';


const oktaConfig = myAppConfig.oidc;
const oktaAuth = new OktaAuth(oktaConfig);

@NgModule({
  declarations: [
    AppComponent,
    LoginComponent,
    LoginStatusComponent
  ],
  imports: [
    BrowserModule,
    AppRoutingModule,
    OktaAuthModule
  ],
  providers: [{provide: OKTA_CONFIG,useValue: {oktaAuth}}],
  bootstrap: [AppComponent]
})
export class AppModule { }
Here we have to import all the essential Modules to use in other components.
Go to the login.component.ts and write the code below
 import { Component, Inject, OnInit } from '@angular/core';
 import { OKTA_AUTH } from '@okta/okta-angular';
 import { OktaAuth } from '@okta/okta-auth-js';
 import myAppConfig from 'src/app/config/my-app-config';
 import OktaSignIn from '@okta/okta-signin-widget';

 @Component({
   selector: 'app-login',
   templateUrl: './login.component.html',
   styleUrls: ['./login.component.css']
 })
 export class LoginComponent implements OnInit {

   oktaSignin: any;

   constructor(@Inject(OKTA_AUTH) public oktaAuth: OktaAuth) {
     this.oktaSignin = new OktaSignIn({
       logo: 'assets/images/logo.png',
       features: {
         registration: true
       },
       baseUrl: myAppConfig.oidc.issuer.split('/outh2')[0],
       clientId: myAppConfig.oidc.clientId,
       redirectUri: myAppConfig.oidc.redirectUri,
       useClassicEngine: true,
       authParams: {
         pkce: true,
         issuer: myAppConfig.oidc.issuer,
         scopes: myAppConfig.oidc.scopes
       }
     });
    }

   ngOnInit(): void {
     this.oktaSignin.remove();

     this.oktaSignin.renderEl({
       el: '#okta-sign-in-widget'
     }, // this name should be same as div tag in the login.component.html
       (response: any) => {
         if(response.status === 'SUCCESS') {
           this.oktaAuth.signInWithRedirect();
         }
       },
       (error: any) => {
         throw error;
       }
     );
   }
 }
Here the The
myAppConfigobject is imported from the application's configuration file (src/app/config/my-app-config) which contains the Okta configuration details like Client Id, issuer and Redirect URIs.The
@Inject(OKTA_AUTH) public oktaAuth: OktaAuth. This injects the OktaAuth object from theOKTA_AUTHtoken provided by the Okta Angular module.the
oktaSignin.remove()method is called to remove any existing Okta Sign-in Widget elements from the DOM.the
oktaSignin.renderEl()method is used to render the Okta Sign-in Widget within a specific element on the page. The element is identified by the ID#okta-sign-in-widget, which should be present in the corresponding HTML template (login.component.html).The
oktaSignin.renderEl()method takes a success callback and an error callback. In the success callback, if the sign-in status is 'SUCCESS', theoktaAuth.signInWithRedirect()method is called to initiate the redirect to the Okta authentication page.Any errors encountered during the rendering process are thrown and can be handled in the error callback.
Go to the login-status.component.ts and write the below code.
 import { Component, Inject, OnInit } from '@angular/core';
 import {OktaAuthStateService, OKTA_AUTH} from '@okta/okta-angular';
 import {OktaAuth} from '@okta/okta-auth-js'

 @Component({
   selector: 'app-login-status',
   templateUrl: './login-status.component.html',
   styleUrls: ['./login-status.component.css']
 })
 export class LoginStatusComponent implements OnInit{
   isAuthenticated:boolean = false;
   userFullName: string = '';

   constructor(private oktaAuthService: OktaAuthStateService,
             @Inject(OKTA_AUTH) private oktaAuth: OktaAuth){}
   ngOnInit(): void {

     //Subscribe to authentication state changes

     this.oktaAuthService.authState$.subscribe(
       (result) => {
         this.isAuthenticated = result.isAuthenticated!;
         this.getUserDetails();
       }
     )
   }
   getUserDetails() {
     // Fetch the logged-in user details (user's claims)
     // User full name is exposed as a property named 'name'
     this.oktaAuth.getUser().then(
       (res) => {
         this.userFullName = res.name as string;
       }
     );
   }

   logout(){
     //Terminated the session with Okta and removes current tokens.
     this.oktaAuth.signOut();
   }
 }
Here OktaAuthStateService is used to get the Success status from the login.component.ts and gets the userFullName by Calling the getUserDetails().
✅We are done with our coding let's try to test our Code. You can run your Code by using the ng serve or npm start command in your terminal.
Note: If you are getting any errors like
This module is declared with 'export =', and can only be used with a default import when using the 'allowSyntheticDefaultImports' flag.
To resolve this issue you can allowSyntheticDefaultImports and noImplicitAny on tsconfig.json. For example
"compilerOptions": {
"allowSyntheticDefaultImports": true,
    "noImplicitAny": true
}
Re-run the code. You can see the results as I mentioned below.
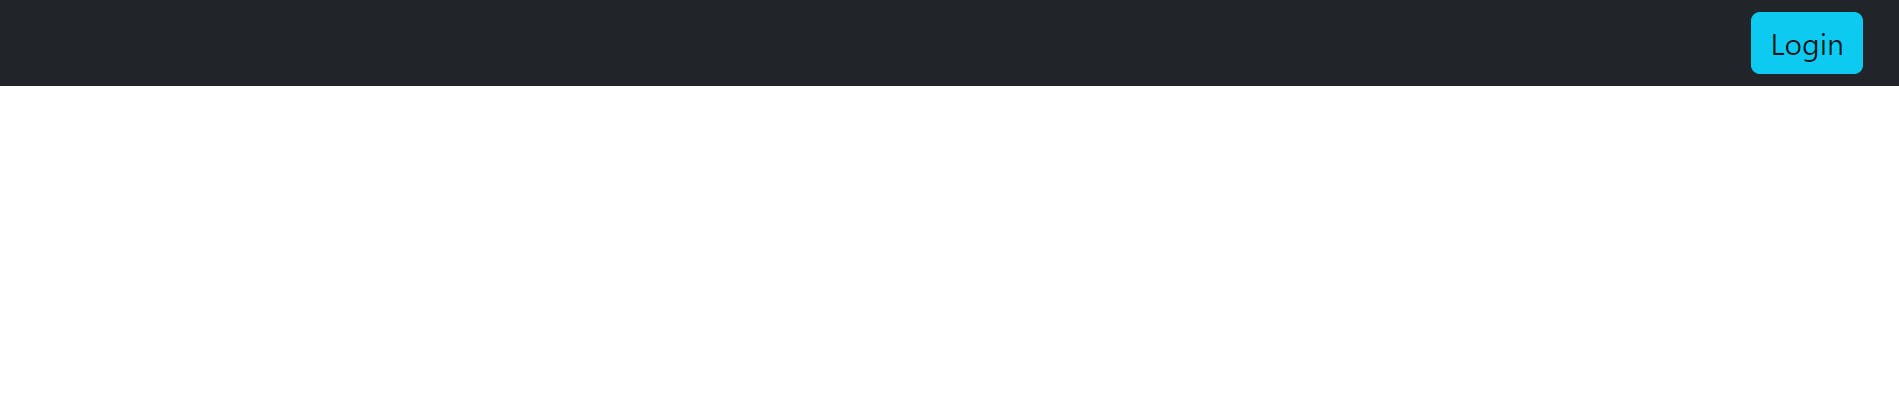
Click the login button you can see the Login page provided by the Okta.
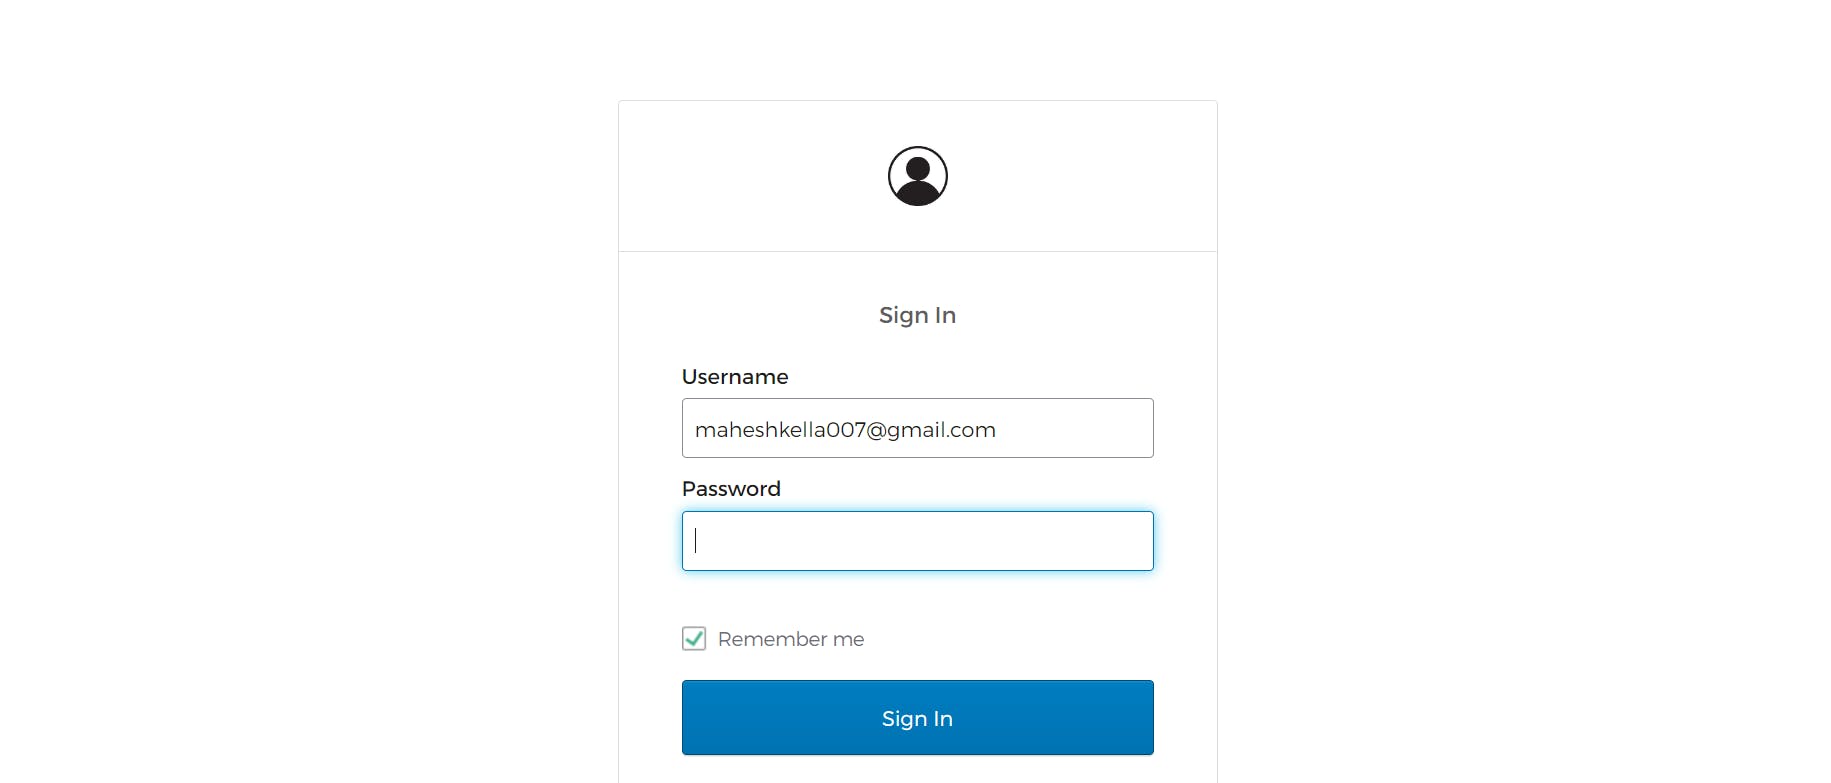
Fill in the login credentials and click sign in then it will check the credentials on the Okta Developer page and next after authentication it will redirect to your angular localhost as mentioned below.

Hurray🥳! You have successfully configured your Angular Application with Okta sign-in-widget.
Conclusion
in conclusion, we have configured our angular application with Okta for authentication and authorization. Once you have configured Okta Sign-in Widget in your Angular application, you can easily add authentication to your application. Users will be able to sign in with their Okta credentials and access your application's protected resources.
Thanks for reading😊 see you in the next blog!